Fabrics I LOVE for my ITH Softies
Body
I love Rose (or sometimes it's called Swirl) Minky! Super soft and snugly!
... you can also use low pile fleece, terry cloth and cotton.
If your machine is good with multi layers of thickness you can also use a low pile faux fur.
Inner ears
Always use cotton unless you know your machine does well with multi layers of fabric.
Limbs
Cotton or fleece
Face
Wool Felt – not craft! Craft will go patchy and bobbly with lots of kisses and that's no fun :(
Fleece - Can't find felt, try Anti pill fleece is super soft and won't fray :)
Tummy Inlays
Wool Felt and Fleece don’t fray - Hooray!
Cotton – woven – always use a heat n bond backing to stop fraying or the Diamond Stitch files.
Adding Cotton Tummies to your ITH Softies
This is fun and easy and once you have made a couple you’ll fly through it :)
Always back your cotton fabric with a piece of Heat n Bond before you attempt to embroider it onto the tummy. It’s an iron on interfacing that holds the woven threads together and thus stops fraying. I am sure other brands out there work I just like this one
I usually use ‘light’ heat n bond, mainly because it allows the cotton to stay supple .. but the ‘permanent heavy’ kind works well too … especially if you cotton is a low thread count and frays easily.
When you cut around the cotton on the tummy you must leave at least a 1/8 inch seam allowance away from the stitches. If you cut the cotton close to the stitches it will fray or just come off, and that’s no fun.
If the light heat n bond isn't working for you you could always try the permanent one. I also like to iron it onto some felt before adding it to the tummy, that way it is sealed from both sides and is nice and stable.
If you follow this method your tummy will not fray :)
I love using this method in my sewing patterns also, please feel free to check it out for a step by step photo tutorial.
How to Rescue your tummy fabric if you forgot to use Heat n Bond – As long as you left a good seam allowance (1/8 – ¼ inch you should be able to use this method). Grab your fray check and seal around the edges. Wait till it dries and then continue on with your stitching.
Key Points in remember – Iron on Interfacing and always cut a 1/8 – 1/4 inch seam allowance.
NEW Diamond Stitch for Tummies
Now all of my cotton tummies and hair come with a Diamond Stitch option!
As a toy designer I love light looking stitches like the Diamond, the heavier ones, like the Satin Stitch, not only add 1/2 an hour or more to the making of the toy but they often detract from the over all unique design.
PLUS Diamond Stitch is not scratchy! Hooray so it will keep your new stuffie super soft and snugly for your little one ♥
Turning and Stuffing Tiny Limbs
I love hemostats for turning! It makes turning small parts like limbs, and big fluffy friends a breeze! Go here for a full tutorial.
When stuffing – don’t over stuff your limbs, keep them squishy and always leave a ¼ - ½ inch gap at the top. This will make sewing around your softie sandwich a breeze!
If you are worried grab your painters tape and tape them down before you add the back piece.
Tools.
An old paintbrush or chopstick works wonderfully - the bristles grab the stuffing and helps you get it into all the corners.
Technique.
Always pull apart your stuffing before you use it. Then add small bits at a time and compact them down/place them using your chopstick or paintbrush.
What stuffing to use?
Poly-Fil
Don't Stuff the ears!! Hahaha they will look kinda silly ;)
Also I recommend using fleece for your 4x4 stuffies limbs and don't stuff them .. the fleece will make them look cute and chunky but it will be so much easier to turn!
Customize your Softies!
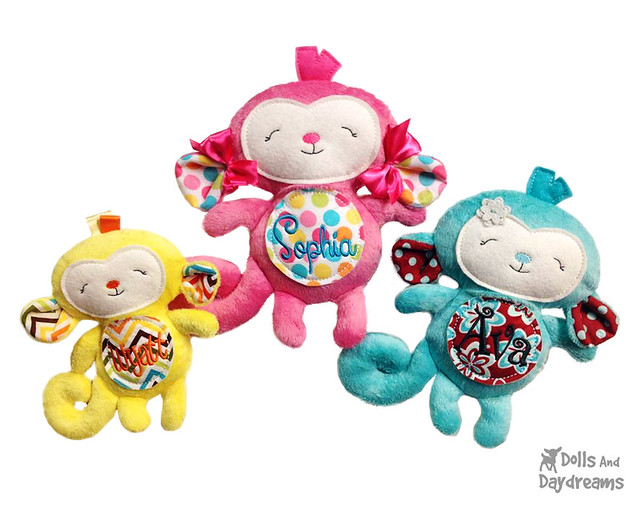
Embroider your child’s name, initials or date of birth onto their tummy fabric (fonts are not included in the patterns). Have fun being creative!
I recommend adding your Monogram/Font just before you add your limbs :)
How to: You will need software or a machine that has the ability to merge designs.
Can't do that? Embroidering the name/letter onto fabric before beginning and simply position it straight over the tummy placement stitch when they get to that step ;) It's a good idea to create one first in your desired size so you can measure the tummy area ;)
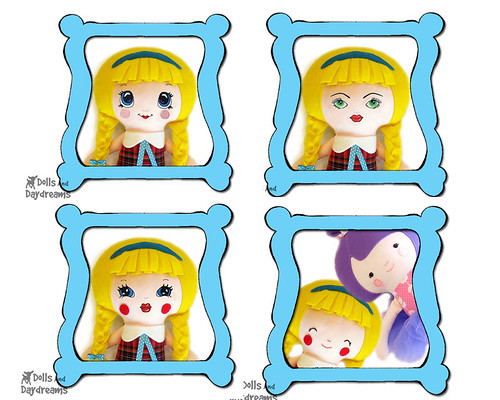
Adding a different Faces:
Tips for minimal puckering on machine embroidered faces. If you are embroidering only the face fabric and are going to sew the doll by hand I suggest hooping your face fabric with the stabilizer. I use mesh cutaway for the stabilizer I hooped. Then I used temporary adhesive to put down the face fabric, smooth it out really well and keep smoothing it as it stitches it in place. Then when I got to embroidering the face, I floated a double piece (one piece folded over) of heavier tear away under the hoop (just tape it in place on the underside of the mesh stabilizer). Tear away that stabilizer after the face is done embroidering. Then after the doll is all finished and stuffed nice and firm, use your iron and steamed out the remaining wrinkles. She will look flawless.
Hoop Sizes
Please use design files as sent, I cannot guarantee the quality of the design if you alter, resize, or reformat the design in any way.
Available Formats
PES, VIP, XXX, HUS, JEF, EXP and DST
If you own a machine that does not work with these formats you can download free conversion software to convert your files at this website: http://www.wingsxp.com/index.php/my_editor/ If you are using a Bernina Embroidery machine and can only use .art format you will need the appropriate Bernina software to convert to .art format.
Transferring Files
You MUST have an embroidery machine to work with these files and a way to transfer the files from your computer to your embroidery machine.
New to ITH?
Due to the number of different types of machines and models out there I suggest reading your user’s manual for transferring files over, contacting your dealer or find a friendly ITH forum and see if someone else has the same machine as you.
Can’t find your Step by Step Photo Tutorial?
The PDF Tutorial is inside the zip file.
- Adobe Reader is required to view and print your pattern. Find it for Free here: http://get.adobe.com/reader/
- Mac users please open your PDF Patterns up directly in Adobe Reader and NOT Apple’s default PDF reader called Preview.
If you still aren't seeing it, try downloading again and wait until it has finished downloading before you click on it to open it up :)
Can’t find your file type?
Can't find it in the zip file? Make sure any new software you have recently installed isn’t making the file format you are looking for in the zip folder ‘disappear’. If you don’t see it, check a known file you have used before and see if you can view it there too. If you can’t … it’s most likely a software conflict.
Hoop Size not working?
Please make sure that the orientation of your hoop is set up correctly. It might be height by width instead of width by height, try rotating it in software


